Showing posts with label Hats. Show all posts

Tuesday, March 12, 2013

Details

I'm sure you all noticed that yesterday's post was.... um... lacking? And by that I mean there was very little detail about anything I mentioned. Today, I shall fix that! (You may find it helpful to have yesterday's post open while you read this.)


  • First, the captain's hat. This was the last one I did, and I honestly had no idea how to do it. I thought it should be a little taller at the front than the back, so I took a rectangle and cut it. My original plan was to use the piece on the bottom of the picture, but I decided the other piece was a better size, so I used that instead. I wasn't really a fan of how it turned out (it looked like the next Mario Bro) so I trashed it and tried again. It turned out a little better the second time! I just stitched on a little crochet chain for the trim.
  • I sort of already said this, but the construction hat was really simple. I used the same pattern as the baseball cap, then sewed a strip down the middle instead of the circle. I also made the bill a lot smaller. Piece of cake!
  • I didn't mention this at all yesterday, but I did go to Michaels on Friday. I picked up three sheets each of yellow, white, black, and blue felt, and a styrofoam ball. I didn't end up using the white, but I was already out so that's alright. I used the styrofoam ball to shape the baseball cap and construction hat, which worked, but wasn't perfect. They're now covered in little pieces of styrofoam on the inside, but that's okay.
  • I just want to say that the glue worked amazingly well. Honestly, I had my doubts about it, but it definitely worked. Just a note, if you do this, make sure you give them plenty of time to dry. I had to wait overnight until I could attach the tags. 
Hopefully you now have your fill of details, so I'm going to get back to work on the TTT!

Monday, March 11, 2013

Spring Forward

This is going to have to be fast, so I'm doing sort of a photo essay. These were the pieces I cut out for my first try at the captain's hat:


I was going to use the bottom, but I ended up liking the piece I cut off better. This turned into that:


 But it was way too Mario Bros for me, so I tried again and made a new one. (No individual pics, sorry!) Here's all the hats before the glue:


The construction hat was made using the baseball hat pattern, with a line down the middle and a smaller brim. Random during shot of the glue process:


As you can see, I used a styrofoam ball to shape the baseball and construction hats. If I do this again, I would definitely try something else. The insides of both hats are covered in little pieces of styrofoam.


I did the glue yesterday afternoon, and they weren't really dry until this morning. I added the tags:


and now they're totally done. I'm turning them in tomorrow, along with the rest of my project, and I'm glad to have them off my to-do list!

Sorry for the quickie, but I'll have more details tomorrow!

Thursday, March 7, 2013

More Hats!

First, I would like to ask you to please excuse the horrendous pictures in this post. My camera and I are currently not speaking.

And it's just one hat:


That's Hat #2, for anyone keeping track. Now, if I was on schedule, there would be two other hats (or at least 1.5), but I had to alter my schedule a bit lot. I barely had any white, blue or black felt when I started these, and after using most of the blue and white to make the baseball cap, I really have almost none. I also haven't had any yellow felt for ages. (This is mostly due to the fact that I haven't done much with felt lately.) This is sort of problematic, because the second top hat is black, the construction hat is yellow with white columns (still working on that one), and the captain's hat is blue. So instead of making hats, I've been doing every other part of the project. This included making a brochure about the State Department, making a "Bag-It" about United States v. Nixon, and making "price tags" to attach to the hats.  I've even already cut out the elephant and donkey that will go on the second top hat:


I should be able to go to Michaels tomorrow, so I'll be able to make the last three hats this weekend! (Which is good, because all that stuff is due on Tuesday.)

I got to stay home yesterday because of "inclement weather." (Snow day!!!!) I was super happy because I got to watch Captain America: The First Avenger and Thor! Don't worry, I put my down time to good use:


I'm now up to over 12 inches! Plus, do you see that little tiny ball? That's right, I'm about to start skein #2:


I gave my wrists a break this morning to start winding.

So basically, I'm super thrilled with my progress on everything, and I can't wait to get back to work. So I'm going to stop here. Goodbye!

Wednesday, March 6, 2013

Mini Top Hat Tutorial (Sewing)

Materials:

  1. felt
  2. needle, thread, etc.
  3. sharp scissors

Step 1:

  • Cut out a felt rectangle: 


  • To get the size, fold it into a tube (hamburger style). It should be about an inch longer than you want it, and a little taller.
  • This is the point where you add any kind of embroidery, applique, etc. Trust me, it is a pain to try to do it at the end. (And I'm speaking from personal experience here. Don't laugh!)

Step 2:

  • Sew the short ends of the rectangle together with the right sides together:

 Step 3:

  • Put the tube on some more felt and trace around it, leaving a lot around the edge:


  • It should be bigger than you think it needs to be. If it looks right, it's too small. (Not that I had to pull my first one off and try again or anything.....)
  • Don't throw the scraps away; you need them later!

Step 4:

  • Sew the circle onto the tube:

  • For this hat, I did this while the tube was still inside out. I've done it the other way before, and I think I like it better.

Step 5:

  • Using the scrap from step 3 as a stencil, draw another circle onto more felt:
  • Then draw another circle around it to make a donut shape:


  • Once again, if it looks big enough, it's not. It's easier to trim or take it in than to rip it out and start over.

Step 6:


  • Cut out the donut:


  • But beware: this is the only time bigger is not better. Cut the inside circle smaller than the line you drew.

Step 7:

  • Sew the donut brim onto the center of the hat. (I don't have an in-progress picture of it, but I think you can figure it out.)

Step 8: 

  • If you cut the inner circle too big, you're not alone. I totally did that too. Lucky for us, I also have a solution:


  • Seriously. Just cut a slit in the brim. I suggest trying to make it line up with the seam of the tube, so you don't end up with this:
  • You can now just pick one of the strips to sew on. Once you're about a 1/2 inch from the end of one strip. you can sew them together (making sure the seam allowance points down). 

You're done! There are an infinite number of uses for this: make one of those headbands, use it for doll clothes, or if you're me, slap a dollar sign on it (aforementioned applique) and call it a Civics project.


I hope you enjoyed this tutorial! Happy sewing!


Tuesday, March 5, 2013

One Hat, Two Hat; Red Hat, Blue Hat

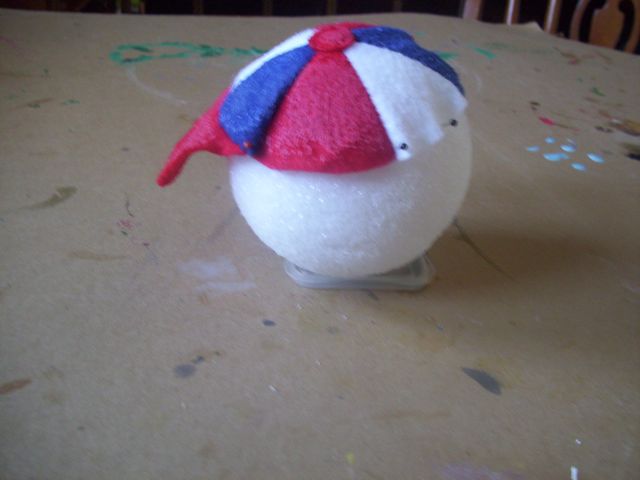
I would just like to say now that I was originally going to have a ton of pictures today. But I decided to save some of them for tomorrow, when I'll be posting a tutorial for the top hat. So, today will be mostly for the baseball hat. I took more pictures than usual (that's not saying much), so you can actually see it coming together.

First, I cut out the pieces:


For a pattern, I used the picture from this site (about half way down the page). Since this is a project about the president, I went all national colors on it. Then, I hand stitched all the triangles together, with a little circle to cover up the center:


(Aside: Doesn't this kind of look like the radiation symbol? I feel like I could use that...) Here's a picture of the back:


Up to that point, it was pretty simple to get everything lined up. Then came the visor. When you put it how it's supposed to be, it lines up fine, right?


No problem. But when you put the right sides together to sew, it obviously doesn't work:


This involved some tugging, stretching, and pulling, but I promise, it will work. And the finished product:


I think it's really cool. My plan is to do something like this to all the hats to make them stiff. I'm also hoping that will help the cap keep its shape. Then, I'll add "price tags" with the information I need. I'm also done with Hat #2:


Once I finish stitching the $ on I'll be good. I'll have more details and pictures tomorrow.

Monday, January 7, 2013

And Breathe....

I'm back! I have lots of random things to show you, so let's get started:

 1. I made my first ever duct tape thing:

It's a rose, I swear.

See?

And that's just what happens when you leave me alone with duct tape. Not pretty.

2. I started a Blossom Festival Scarf:

I know, my photography has improved a lot.

I was cranking along on this for a few days (in early December) but as you can see, I came very close to running out of yarn. I put it in a drawer, and I have the rest of the yarn I need now, but I still haven't pulled it out. 

3. I made these things:


What are they called, anyway? They were both last minute Christmas gifts, along with this snowflake I made. I know I took a picture of it, but I can't find it!!!

4. I made this hat Saturday night:

Thanks to my tissue box for modeling.

This took me as long as it takes to watch Revenge of the Sith twice (don't ask) plus about half an hour. I still need to add the crochet border, and maybe something on top, but I'm too busy glaring at it. It turned out way smaller than I thought it would, so I now have to find a small person to bestow it upon. I am pretty proud of it, since it was my first experience with colorwork. (Although I do need a lot of practice!) I used this pattern, and I would definitely make it again if it was bigger.

5. I watched people open presents. I was a little worried about this scarf:


not being liked, but I had no worries about this one:


In fact, the seven year old recipient of the blue scarf absolutely adored it, and wore it out that night (with a black sweater, but I didn't even mind that much). The nine year old recipient of the pink scarf didn't really care. Later that night, I just laughed, because it was the exact opposite of what I expected to happen. In general, everything I made went over pretty well, so I was really happy!

I have one last super secret sewing project that I have to have done by the 14th, so I won't be working on other stuff much. I'm glad to be back, and I hope everyone had a happy holidays!


Friday, August 31, 2012

Mohawking

I'm saying hi to my dad. He's awesome.

Anyways, I have mohawked:


until I could not mohawk anymore. I am going to throw this in the wash sometime, probably this weekend. I should have that done by Tuesday, plus some pictures taken in natural light that don't make the mohawk look like it's neon orange. Because it's red.

I know you're not surprised I didn't cross stitch yesterday morning. I was mohawking, so I think it's OK.

Have a great weekend, and happy Labor Day! I'll see you guys on Tuesday!

By the way: I posted every single weekday this month. I feel awesome!

Thursday, August 30, 2012

Give Me an M!

Because that's all I have of the mohawk hat:


Not a lot of mohawk. I really just need half an hour to sit down and work on that and that alone, which should happen sometime between now and next week. Weekends are more craft-friendly for me!

I am completely ignoring the cross stitch ornaments. Not the best way to get them done, I've heard. I have some time this morning..... Maybe I'll pull one out?

Have a great day, and do more knitting than me! :)

Monday, August 27, 2012

Gingerbread Factory

Can you imagine how good that would smell? Anyway, on Thursday afternoon I made these:


I am seriously considering redoing this one's face. It's kind of ugly.


Then on Friday I made this:


Well, I actually finished some of the knitting on Saturday morning, and I still have to put in the mohawk. But still. I did most of it on Friday.

When I was helping my friend move, we found a plastic container filled with little erasers. She didn't want them, so I took a bunch:


I took all the whales and parrots! Plus some fish. I'm thinking jewelry.....

Yesterday I went to Michaels (again) and got these things:


Charms, pliers, mohawk yarn, and glass things. I now have everything I need to finish Christmas. I honestly can't believe it! (OK, so right after I typed that sentence I had a little panic attack about masking tape. I seriously thought that I didn't have any, and because of that sentence I would be unable to find any anywhere. But it's OK. I found some under the knife drawer.) Now all I have to do is make it all. Speaking of which:


My Crafty Christmas To-Do List
  • make two etching projects
  • put the mohawk on the mohawk hat
  • make two charm necklaces
  • finish catnip ornament
  • make another cross stitch ornament
I'm getting to the end. I'm super excited. On Saturday I spent a lot of time making a list of things I was going to make, just for me. For fun. After the Christmas stuff is done. I can't wait.

Monday, August 13, 2012

Where to Now?

Hi guys! I had an awesome vacation, and I'm sure you're all sick of lists, but I have a few more for you.


First, just a few updates regarding things I mentioned last week:

  • I threw away the wrap bracelet. It was ugly, and annoying, and it wasn't working right, so I set it up on a blind date with my trash can.
  • I did a little bit on the bird bag, and I'll have a picture of that tomorrow. Most likely.
  • I made a tiny globe knot necklace! (Confused? Go look here.)

I used a drawstring from a pair of shorts, and a random white marble I dug around for. Three problems: the cord is too thin, the marble is to big, and the obvious one involving cord length. The video didn't specify where in the cord to start, nor did it show it's full length, so I just started in the center and hoped for the best. It didn't work out so well, so I had to glue the two ends together:


OK, I swear I took a picture of it glued. Just take that picture, and imagine the two ends glued and twisted. That's right, twisted. I wore heavy garden gloves, and I actually didn't burn myself! (I was surprised too!) I am planning on putting a flower or other doodad over the spot I glued, and I'll be all done.

Now here is a project that is so crazy I should be locked up for even considering doing it:


It looks innocent enough, doesn't it? Doesn't really look like a project either.... How about some back story?
 This comes from me doing something I have never done before. This weekend my family stayed in a house owned by my aunt and uncle, along with many other assorted family members. My uncle took a few of my cousins and I garage-saling. It was quite the experience, but I did pick up this skirt. Let's take a closer look:


Do you see the project yet? I'm re-sewing all the sequins back on. Yes, I am completely insane. Here's why (about the sequins, not my insanity):


Can you see?


How about now? All the sequins are strung together! (Well not all of them; there is more than one piece of thread.) This means if one sequin goes, they all go. In fact, a whole bunch already have. So I'm going through and painstakingly unthreading and re-sewing Every. Single. Sequin. And there's a whole bunch. This will be one of the only things I will do, once I really get into it, so I'm thinking about keeping it packed away until I finish with Christmas. Speaking of which....

My Crafty Christmas To-Do List

  • buy supplies for, and make, two etching projects
  • buy yarn for, and make, a mohawk hat (I have a pattern, I just can't find the link right now)
  • finish the embroidered bag
  • find a pattern and yarn for an M&M dishcloth, then make it. I had a pattern I liked, but the blog disappeared! There's another one I have seen, but I don't like it. Hmmm, how hard would it be to make my own?
  • make two more (better) globe knot necklaces
  • come up with two more really great ideas, because there are two more people on my list!
That's it! Just a hat, a dishcloth, two fifteen minute necklaces, some etching, and some mysteries!