Showing posts with label Sewing. Show all posts

Tuesday, March 12, 2013

Details

I'm sure you all noticed that yesterday's post was.... um... lacking? And by that I mean there was very little detail about anything I mentioned. Today, I shall fix that! (You may find it helpful to have yesterday's post open while you read this.)


  • First, the captain's hat. This was the last one I did, and I honestly had no idea how to do it. I thought it should be a little taller at the front than the back, so I took a rectangle and cut it. My original plan was to use the piece on the bottom of the picture, but I decided the other piece was a better size, so I used that instead. I wasn't really a fan of how it turned out (it looked like the next Mario Bro) so I trashed it and tried again. It turned out a little better the second time! I just stitched on a little crochet chain for the trim.
  • I sort of already said this, but the construction hat was really simple. I used the same pattern as the baseball cap, then sewed a strip down the middle instead of the circle. I also made the bill a lot smaller. Piece of cake!
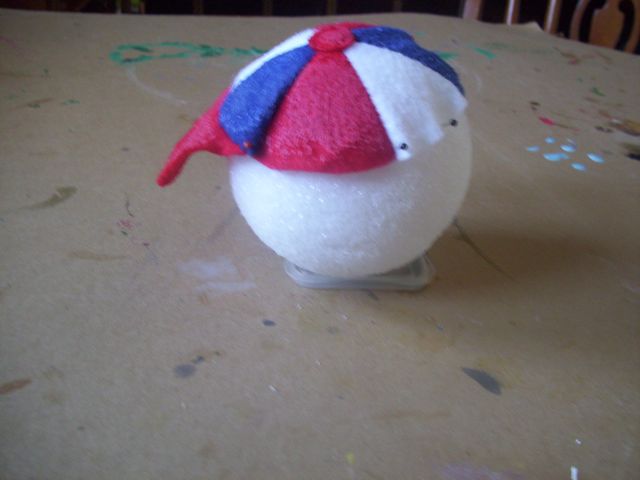
  • I didn't mention this at all yesterday, but I did go to Michaels on Friday. I picked up three sheets each of yellow, white, black, and blue felt, and a styrofoam ball. I didn't end up using the white, but I was already out so that's alright. I used the styrofoam ball to shape the baseball cap and construction hat, which worked, but wasn't perfect. They're now covered in little pieces of styrofoam on the inside, but that's okay.
  • I just want to say that the glue worked amazingly well. Honestly, I had my doubts about it, but it definitely worked. Just a note, if you do this, make sure you give them plenty of time to dry. I had to wait overnight until I could attach the tags. 
Hopefully you now have your fill of details, so I'm going to get back to work on the TTT!

Monday, March 11, 2013

Spring Forward

This is going to have to be fast, so I'm doing sort of a photo essay. These were the pieces I cut out for my first try at the captain's hat:


I was going to use the bottom, but I ended up liking the piece I cut off better. This turned into that:


 But it was way too Mario Bros for me, so I tried again and made a new one. (No individual pics, sorry!) Here's all the hats before the glue:


The construction hat was made using the baseball hat pattern, with a line down the middle and a smaller brim. Random during shot of the glue process:


As you can see, I used a styrofoam ball to shape the baseball and construction hats. If I do this again, I would definitely try something else. The insides of both hats are covered in little pieces of styrofoam.


I did the glue yesterday afternoon, and they weren't really dry until this morning. I added the tags:


and now they're totally done. I'm turning them in tomorrow, along with the rest of my project, and I'm glad to have them off my to-do list!

Sorry for the quickie, but I'll have more details tomorrow!

Thursday, March 7, 2013

More Hats!

First, I would like to ask you to please excuse the horrendous pictures in this post. My camera and I are currently not speaking.

And it's just one hat:


That's Hat #2, for anyone keeping track. Now, if I was on schedule, there would be two other hats (or at least 1.5), but I had to alter my schedule a bit lot. I barely had any white, blue or black felt when I started these, and after using most of the blue and white to make the baseball cap, I really have almost none. I also haven't had any yellow felt for ages. (This is mostly due to the fact that I haven't done much with felt lately.) This is sort of problematic, because the second top hat is black, the construction hat is yellow with white columns (still working on that one), and the captain's hat is blue. So instead of making hats, I've been doing every other part of the project. This included making a brochure about the State Department, making a "Bag-It" about United States v. Nixon, and making "price tags" to attach to the hats.  I've even already cut out the elephant and donkey that will go on the second top hat:


I should be able to go to Michaels tomorrow, so I'll be able to make the last three hats this weekend! (Which is good, because all that stuff is due on Tuesday.)

I got to stay home yesterday because of "inclement weather." (Snow day!!!!) I was super happy because I got to watch Captain America: The First Avenger and Thor! Don't worry, I put my down time to good use:


I'm now up to over 12 inches! Plus, do you see that little tiny ball? That's right, I'm about to start skein #2:


I gave my wrists a break this morning to start winding.

So basically, I'm super thrilled with my progress on everything, and I can't wait to get back to work. So I'm going to stop here. Goodbye!

Wednesday, March 6, 2013

Mini Top Hat Tutorial (Sewing)

Materials:

  1. felt
  2. needle, thread, etc.
  3. sharp scissors

Step 1:

  • Cut out a felt rectangle: 


  • To get the size, fold it into a tube (hamburger style). It should be about an inch longer than you want it, and a little taller.
  • This is the point where you add any kind of embroidery, applique, etc. Trust me, it is a pain to try to do it at the end. (And I'm speaking from personal experience here. Don't laugh!)

Step 2:

  • Sew the short ends of the rectangle together with the right sides together:

 Step 3:

  • Put the tube on some more felt and trace around it, leaving a lot around the edge:


  • It should be bigger than you think it needs to be. If it looks right, it's too small. (Not that I had to pull my first one off and try again or anything.....)
  • Don't throw the scraps away; you need them later!

Step 4:

  • Sew the circle onto the tube:

  • For this hat, I did this while the tube was still inside out. I've done it the other way before, and I think I like it better.

Step 5:

  • Using the scrap from step 3 as a stencil, draw another circle onto more felt:
  • Then draw another circle around it to make a donut shape:


  • Once again, if it looks big enough, it's not. It's easier to trim or take it in than to rip it out and start over.

Step 6:


  • Cut out the donut:


  • But beware: this is the only time bigger is not better. Cut the inside circle smaller than the line you drew.

Step 7:

  • Sew the donut brim onto the center of the hat. (I don't have an in-progress picture of it, but I think you can figure it out.)

Step 8: 

  • If you cut the inner circle too big, you're not alone. I totally did that too. Lucky for us, I also have a solution:


  • Seriously. Just cut a slit in the brim. I suggest trying to make it line up with the seam of the tube, so you don't end up with this:
  • You can now just pick one of the strips to sew on. Once you're about a 1/2 inch from the end of one strip. you can sew them together (making sure the seam allowance points down). 

You're done! There are an infinite number of uses for this: make one of those headbands, use it for doll clothes, or if you're me, slap a dollar sign on it (aforementioned applique) and call it a Civics project.


I hope you enjoyed this tutorial! Happy sewing!


Tuesday, March 5, 2013

One Hat, Two Hat; Red Hat, Blue Hat

I would just like to say now that I was originally going to have a ton of pictures today. But I decided to save some of them for tomorrow, when I'll be posting a tutorial for the top hat. So, today will be mostly for the baseball hat. I took more pictures than usual (that's not saying much), so you can actually see it coming together.

First, I cut out the pieces:


For a pattern, I used the picture from this site (about half way down the page). Since this is a project about the president, I went all national colors on it. Then, I hand stitched all the triangles together, with a little circle to cover up the center:


(Aside: Doesn't this kind of look like the radiation symbol? I feel like I could use that...) Here's a picture of the back:


Up to that point, it was pretty simple to get everything lined up. Then came the visor. When you put it how it's supposed to be, it lines up fine, right?


No problem. But when you put the right sides together to sew, it obviously doesn't work:


This involved some tugging, stretching, and pulling, but I promise, it will work. And the finished product:


I think it's really cool. My plan is to do something like this to all the hats to make them stiff. I'm also hoping that will help the cap keep its shape. Then, I'll add "price tags" with the information I need. I'm also done with Hat #2:


Once I finish stitching the $ on I'll be good. I'll have more details and pictures tomorrow.

Saturday, February 23, 2013

Departure

Today's post is a bit of a departure from tradition-in case you are calendar-challenged, today is Saturday. (Can we just ignore the fact that that sentence made almost no sense?) Anyway, since I missed posting yesterday and Thursday, I thought I would do a little makeup and show you what I would have posted about.

Like this!


Voila! Awesomeness has been achieved! So my plan for this weekend is basically to try to get as much done as possible in the real world while working on the TTT in between. It's a solid strategy (but bear warning, this may not result with a whole lot of progress).

Talking zebras make purple pizzas.

Wednesday, February 20, 2013

Still Wish I Was There

Check it out!


That's right, I did another side! I realize that doesn't sound that impressive, but I literally just did that in the last 20 minutes. Which includes the thread breaking twice. Apparently, it doesn't like being yanked on. Who knew? (Yes, I am kidding. I did know that.)

Despite the hour I spent on Monday meticulously lining up the edges, they're still a little off, so I've decided to just make it a pillow. The little tiny bubbles will help with the shape of it, and no one will ever know any different! (Except you. So no snitching, you hear?)

I did a few rows on the TTT yesterday, but nothing to get that excited about. I don't think I've even hit 14 inches yet.


So yeah, it basically looks the same....

I have found a new way to waste hours at a time: Harry Potter Pinterest boards. They're so addicting, and I can't help but say, "Just one more!" over and over and over and potato and over and over and over again. (How many of you noticed I stuck a potato in there? Ad how many of you just went back and checked?)

I'm going to end this here, and I'm definitely not going back to Pinterest. I swear. (Seriously, I need to go shower.)

Tuesday, February 19, 2013

Greetings from France!

Yeah. I wish. But I do have this:


How cool is this? (Yes, this is the part where you pretend it's the best thing since sliced bread.) I got my inspiration from things like this, but I didn't actually look at one while I did this. I'm totally in love with this right now, though. Although it is taking a lot of work (everything is hand stitched), I can't wait until I have the end product. I haven't decided if I'm going to put stuffing in to make a little pillow, or leave it flat. I've done similar things before, but that was two years ago, so I don't have pictures. I might do this again, maybe with Germany, so I might make a little tutorial. Don't worry. It's simple enough that even if I write it you'll be able to figure it out! (Actually, I bet some people could just by looking at the picture.)


This was supposed to be a nice close up of my little stitches, but (shocker) it turned out blurry and I couldn't get a focused shot. I still thought it looked cool.

Guess what takes two rulers to measure?


That's right! I now have just over thirteen inches, which means less than six to go until it gets really crazy. I've never done armhole shaping before, and I'm starting to think 3x2 ribbing wasn't the best way to learn.

Do you know how to spell tchotchke? Well, you do know. See ya!

Tuesday, February 12, 2013

It's a Box! Again!

Despite my doubts of last week, I did get a bunch done on the TTT:


I'm up to about 10 inches, which means I have about 9 1/2 inches left, I think (then a whole bunch more).

I also had fun with some glue. Do you remember this?

It's okay. I didn't really expect you to. But it's this bookend I made out of a box, then covered it in saran wrap. (Which was really stupid and lame, but after experimenting with clear nail polish I honestly couldn't think of anything else. Which was stupid.)

Finally, I realized the Mod Podge could be used as a sealant, so I tore off that plastic wrap and noticed this:


That wasn't going to fly, so before I glued it, I painted over the tape holes. However, the sharp-eyed amongst you may have noticed that the box in those pictures is already shiny. Yeah. After fixing the first set of holes and adding glue, more showed up. Not really sure why, but it doesn't really matter:


I'm much happier with this version!

As I mentioned earlier, I spent time on the TTT earlier. This is because my thoughts on Friday were totally and completely crazy. It literally took me over an hour to graph out a circle, so there is no way I will ever, in any shape or form, be able to do these. Not really sure what I was thinking, but for now I'm just going to go with these and a gift card:

Ciao!

Monday, January 28, 2013

Queen Amidala of the Naboo

I had a decent amount of this fabric, which I found in the basement:


My original plan was to make this dress, but I had forgotten the details of the instructions, and I actually didn't have enough. So.... I improvised! First, I was going to make a skirt, but it was a lot shorter than I liked, so I added a ruffle, which I didn't really like, so I sewed the bottom shut, added a strap, and called it a bag:


Before I got to that point, I cut off two pieces, one of which I used to make this maxi dress for my cousin's doll:


It started out strapless, but I thought my aunt and uncle might not appreciate that, so I made it a halter:


It goes well with the strings on the back of her neck.....


Can you spell creepy?! Speaking of creepy, check out the inside of Queen Amidala's head!


I started her last night, and here's what I had this morning:


I had and issue with making the hair/skin division even, so after a few tries, I just decided to do a sort of duplicate stitch over the parts that weren't the color I wanted them to be.

 I used an empty cardboard box for the base, and colored it red so it wouldn't show as much:


This morning I got up at 5 for a trip to my state's capital, but because of some cruddy weather, it got canceled, and know I'm stuck at home all day. (I'm not bitter, I'm not bitter, I swear I'm not bitter!) Luckily, I was able to put the time to good use, and I worked on patching up her hair.


Look's pretty good, eh? It took me over an hour, during which I realized I could never be a hairdresser is real life:


I got so frustrated, I had to resort to drastic measures. Anyway, due to my lack of safety eyes, I can't go any farther on the head (hence the cut yarn) so I did all the other pieces instead:


I have to admit, I didn't think the collar would fit around her neck, but I made it work. However, I was not as happy with the sleeves:


I like the shape of the one on the right a lot more, but I figured it would take forever to make two that matched. I just stuck them on under the collar, and they look fine. I haven't decided if I want to do the whole pipe cleaner thing. I think it might look better if I crocheted a little border instead. Finally, I made her hair:


which happens to look a lot like dog poop. And not in a good way.... I lost count of my rows five or six times, so I just guesstimated for the length. Once I get the eyes, gold metallic thread, and possibly clay (I might  have something that'll work) I'll be able to finish Her Majesty, but for now, I have a date with the TTT:


Have an awesome day!